I love a good cracker, but often quality ones are hard to find and very expensive! These Sourdough Crackers will ruin you for ever buying crackers from the store again. They are without a doubt the most flavourful cracker you have ever had, and they are so simple to make! They only contain 5 ingredients, have you ever had a peak at the back of a cracker box? It’s pretty wild how many things they put in them, once you make these you will see that it’s absolutely unnecessary.
They are a great way to use up that discard sitting in your fridge, and they make the best snacks! My kids love them, and they are even better when you add a little cheese! They are the perfect cracker to eat with cheese, and in my opinion they REALLY level up a charcuterie board. The only difficult thing about make these, is rolling them out really thin and its really not that bad. I have worked with firmer cracker doughs, this one is softer so it is much easier.
If you are trying to level up your cracker quality even further, you can use different types of flours. Things like einkorn, spelt, fresh milled wheat, will all work but you will need to adjust you water content, and likely increase it a bit. Einkorn crackers are particularly delicious, but for simplicity sake we are going to do these sourdough crackers with all-purpose flour.
What you need:
- Mixing Bowl
- Dough Whisk or Wooden Spoon
- Parchment Paper
- Baking Sheet
- Pastry Brush
- Rolling Pin
Ingredients:
- All Purpose Flour
- Flat Sourdough Starter (Sourdough Discard)- If you need to make a Sourdough Starter check out how to here!
- Salt
- Butter
- Olive Oil
How to make the Sourdough Crackers?
Start by pouring all ingredients into your bowl, and mix with wooden spoon or danish whisk until they come together in a shaggy dough. Then you are going to knead the dough for a few minutes until it is soft and smooth. You can add flour on your hands if needed, but be careful not to add too much flour, because it will make your cracker dough quite hard.

Wrap your dough in plastic wrap, or beeswax wrap and allow it to ferment in the fridge for 1 hour. You can leave it up to an entire day if needed. The longer you let it sit, the better it will ferment!
After it has been at least an hour, take your dough out and divide it in half. This isn’t 100% necessary, but I do find it easier to roll out evenly, doing it in two portions. At this time you can also preheat your oven to 350F.

Take one half of the dough and place it on a lightly floured piece of parchment paper. It is really hard to roll it out on a countertop surface and transfer to a baking sheet, the dough is so thin it makes for a frustrating experience. Parchment really helps to be able to roll it out as thin as possible and then slide the entire works onto the baking sheet.

Begin rolling dough, working it out as evenly as possible as you go. You will likely need to flour the rolling pin when doing this, to prevent the dough from breaking and lifting. Roll dough out until its about 1/16 of an inch, too thick and they will resemble more of a pie crust in texture.


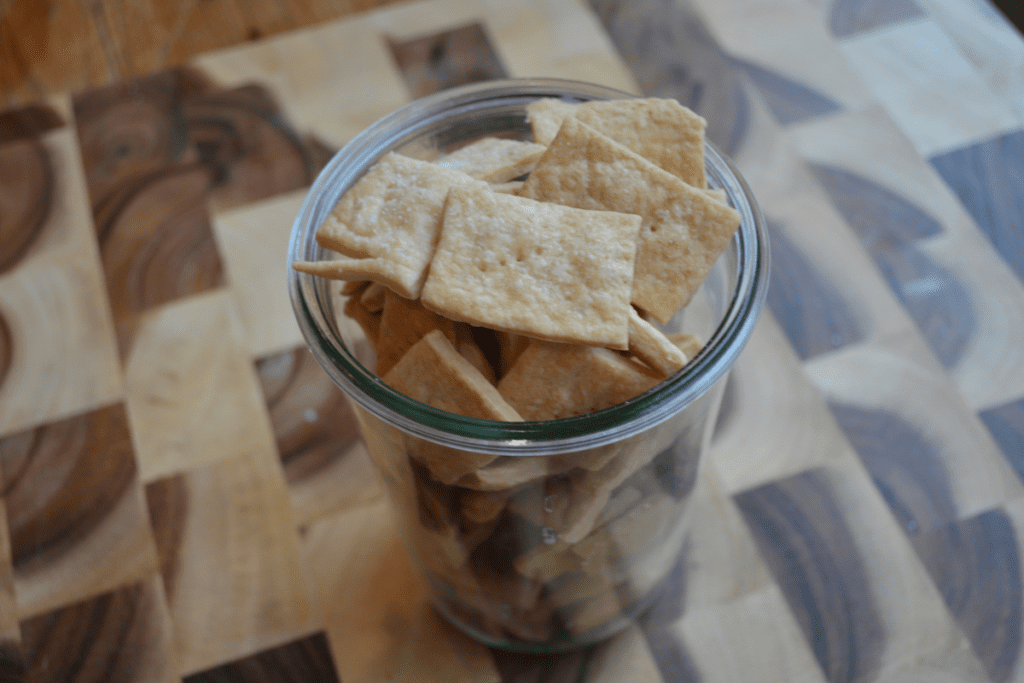
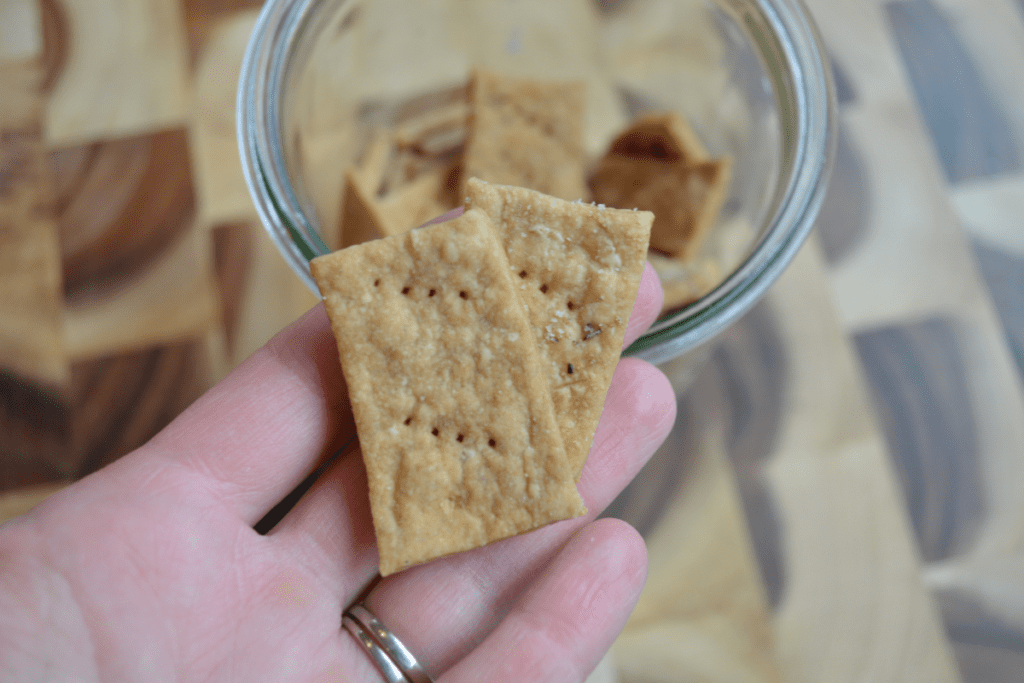
Once dough is rolled out, it is time to cut them! Now I have seen a few methods that just light score them, and break them apart in the baking process, but I find cutting them straight through with a sharp knife or pizza cutter works great. Start by cutting off your uneven edges- you can leave these on the pan if you want and eat them, they are just as good. Then cut rows 1′ apart, going both vertically and horizontally. This will leave you with about 1′ square crackers. If you are needing them larger, for a snack you have in mind, then definitely do so!

After you have finished cutting the squares, its time to poke holes! Poke a few holes with a fork, in each cracker. This will prevent them from puffing up when they are baking.

Now it’s time to brush with olive oil. I have tried brushing with butter, and it does work! I do think it definitely gives more of a crispy pie crust texture, but whatever you like using is totally fine!


Sprinkle with a little sea salt, and if you want to add extra herbs on top! I love doing rosemary both in my dough, and on top, with a flakey sea salt!
Now pop them into preheated oven, and bake for 20-25 minutes, turning them around half way through. Cook until golden brown. When they are done bring them out, and allow them too cool before eating or placing in a sealed container for storage. There you have it! Your own Sourdough Crackers, are as easy as that! You will NEVER want to go back to buy dry cardboard crackers again… I promise!


Storage Notes:
Store in a sealed container or bag for 1-2 weeks- although I have never had them around long enough to go stale!


Simple Sourdough Discard Crackers
Ingredients
- 1 Cup Flat Sourdough Starter Discard
- 1 ¼ All Purpose Flour
- 1 Teaspoon Salt + more for sprinkling
- 4 TBSP Butter- Room Temperature
- 2 TBSP Herbs – Optional
- Olive Oil for brushing
Instructions
- 1. In a mixing bowl, add sourdough starter, flour, salt & butter. Add as well as any herbs, if you are using them.
- 2. Mix until dough comes together.
- 3. Knead for a few minutes until dough becomes smooth, adding small amounts of flour if needed.
- 4. Wrap dough in plastic wrap, and refrigerate for 1 hour (can be longer if needed).
- 5. Bring dough out and cut into two halves.
- 6. Preheat oven to 350 F
- 7. Roll out each half on lightly floured parchment paper. Trying to get it as thin as you can, about 1/16 of an inch. If it is not thin enough, your crackers can come out more like a pie crust.
- 8. Once it is rolled out, cut off uneven edges around the sides and then cut dough into 1 inch squares.
- 9. Poke each cracker with a fork, so that they don't puff up when they bake.
- 10. Brush with olive oil and sprinkle salt on to, and more herbs if you wish. I have used the butter to brush, it works but they do tend to become more like a pie crust so I prefer olive oil.
- 11. Bake in the oven for 20-25 minutes, turning pan around half way through. Bake until golden brown.