

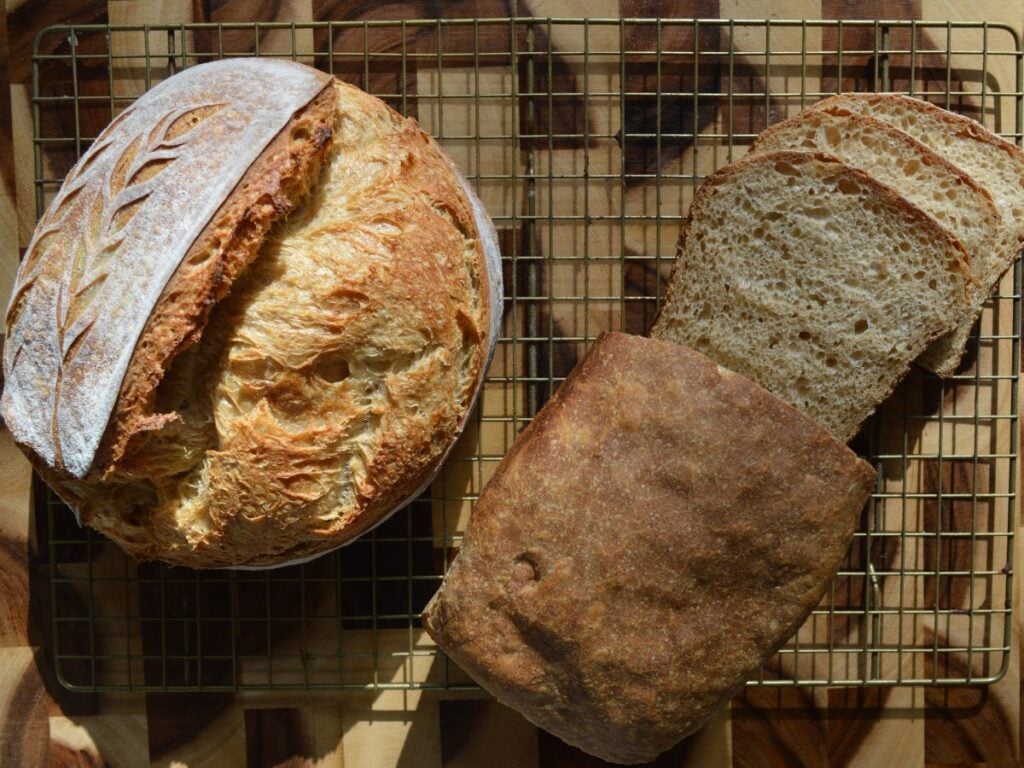
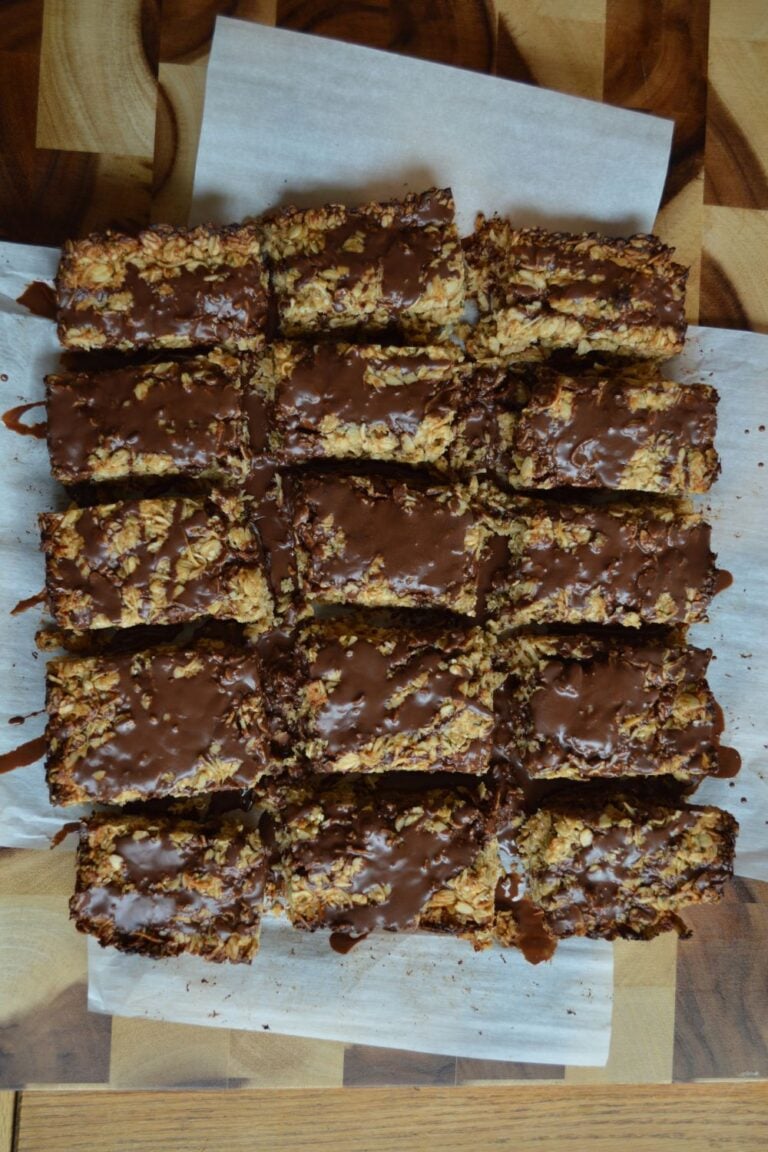
This beginner sourdough bread recipe is not like many I have tried, and it is sure to WOW anyone in your home, or anyone you make it for! The reason it is unlike other sourdough sandwich breads, is that we aren’t sacrificing the taste and characteristics of the traditional style loaf that we love. The best part? This one recipe can be used to make both sandwich style loaves, and artisan style!
When I first started on my sourdough journey- and a JOURNEY it is! I swear I tried every single method on the internet! Okay that’s maybe a bit dramatic, but honestly it felt that way! I wanted something that was easy to fit within my schedule, beginner friendly and gave all the taste and character of a traditional sourdough loaf, but with a bit more versatility. What I found on my adventures was that most sourdough sandwich loaves, contained things like honey, butter & milk. Which does give it a softer more sandwich bread like texture, but it was not what I was looking for.
The first time I thought about just shaping my regular traditional sourdough dough, into a sandwich style shape It was on a whim and I was in a pinch for bread. Not only did I discover that this worked as a shape, but also could shorten up the proof time- it was a WIN WIN! Because of this, it can also be used to make traditional boules or batard style crusted loafs!
I had been making our sandwich loaves this way, and It didn’t actually dawn on me how good and how different it was to others. One day my husband said to me “This is my favourite bread, that you make.” At this point I had made a lot of different bread recipes, so this really stuck and I decided that other people needed this loaf in their life!
I use this recipe weekly in our house, and I do think it is suitable for anyone beginning their journey in sourdough. One really nice thing about this recipe, is that the timeline is really flexible. Even though you are using a more traditional sourdough recipe; of just flour, water, salt, we are baking it in regular loaf pans and it doesn’t need as much time to form the same structure of gluten that is needed when you bake, the artisan style version in a dutch oven. Because the crust could have a tendency to get crustier, than a typical sourdough sandwich bread, I rub butter on the tops if I am shaping into a loaf style!

What you will need:
- Loaf Pan(s); Here are my favourite cast iron loaf pans
- Mixing Bowl
- Kitchen Scale
- Dough Hook (Optional, but it really helps)
- Parchment Paper
- An Active Sourdough Starter; check out my guide on making your own or you can also purchase a dehydrated one.
- Dutch Oven – If doing artisan loaves.
- Banneton Basket or Tea Towel lined Bowl
Ingredients:
Single loaf (Double ingredients for 2 loaves)
- 125g Active Sourdough Starter
- 400g Bread Flour or All Purpose (with at least 13-14% Protein content)
- 250g Water
- 7.5g Salt
Sample Timelines:
I know that sometimes figuring out when you are doing what can be confusing! Then you end up baking bread at 2 am haha I have put together two sample timelines. These are based off a general timeline, and will need to be adjusted based on the environment of your home. You may need to just give it a try, and then adjust as needed. For example: Your starter may not take 12 hours to get to peak, so you may need to adjust your feeding to only 8 hours before you want to mix bread.
Method:
Step 1: Feed Starter or Prepare Leaven
10-12 hours before you are wanting to start your bread you will want to feed your starter or make up leaven.
What is a leaven? The term “Leaven or Levain” means a substance used in dough to make it rise. A Leaven in sourdough recipes is often referred to as a separate “batch” of starter, that you feed and make up specifically for the recipe you are using.
To make your leaven: You will want to add equal parts flour and water to make up amount needed for the recipe. For example: A single loaf of this recipe calls for 125g Active Starter, so to your container or jar, you will add:
- 62.5 g of flour
- 62.5g of water
- 10g Sourdough Starter (That you already have going)
Mix everything together really well
Alternatively, you can just feed into your starter in its existing jar (if there is space), the amount of flour and water needed to make up the recipe, and ensure you have enough for the recipe and to keep your starter going for future.
My Favourite Jars to keep my starter in are these Weck Jars!!

Step 2: Mix Dough for the Beginner Sourdough Bread
When your starter is looking ready, usually about 10-12 hours after you fed it. I say usually because if you have a warmer home, or live in a warmer climate this could change the timeline for its rise, and that is something you can learn and play around with when you feed your starter regularly. I find feeding and observing its patterns very helpful when it comes time to actually baking with it. When your starter is ready it will have doubled or tripled in size, be nice and bubbly and sort of “domed” on top. Not sinking back down into the jar,
Add water into a mixing bowl, and add your active starter/leaven, mix well until it is cloudy and starter is mixed into water.
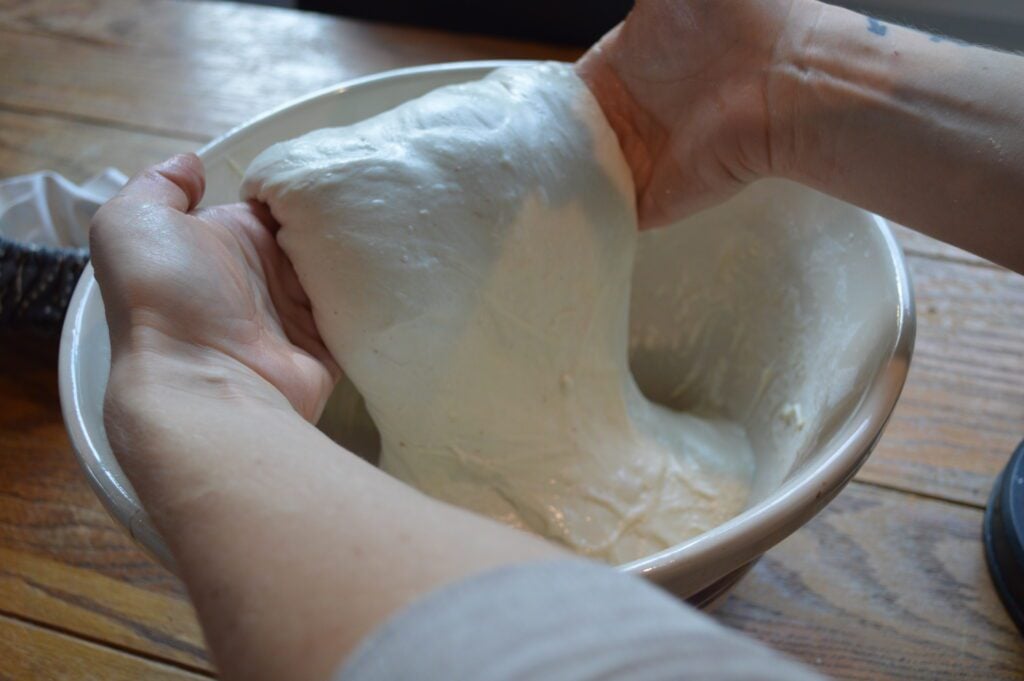
Add your flour, mix until it comes together and flour is entirely worked in. Keep your hands wet when working with your dough, this will really help prevent it from sticking. Dough at this stage will be very sticky at this point and that is totally normal!
Step 3: Autolyse
Let dough Autolyse for 30-45 minutes.
What is Autolysing? The term “autolyse” is when the water and flour in a bread recipe, are pre-blended and set to rest for a period of time, before the salt is added. This resting period gives the dough special processing characteristics and improves the overall quality of the baked goods
Step 4: Adding Salt
Sprinkle salt on top of dough mixture, and work salt into dough. It is important to keep hands very wet with water to help the salt work into the dough, you can also pre-mix your salt with a tbsp of water to help as well, but I don’t always find that necessary. When salt is fairly worked in, I fold edges of the dough up and over, then flipping the dough over in the bowl so that a smooth surface is on top.

Let dough rest for 45 minutes.

Step 5: Fold Series
Perform Folds on all sides of the dough, repeat 3-4 times, at 30 -45 minute intervals.
You can choose which ever fold style you would like, either a Stretch & Fold or a Coil Fold. The reason we perform folds, is to help create and strengthen the gluten structure in the dough. I have a preference for Coil Folds. I think they create better structure in dough, but it’s really up to you and what you like. You can do a mixture of both, as well!
What is a Stretch & Fold? A method of manipulating dough. You lift one side of the dough at a time, folding it up and over. Circling around so that you get all edges.

What is a Coil Fold? It is another method of manipulating dough. Lifting the dough up in the centre, allowing it to fall down on either sides of your hands. Then gently fold it down overtop of itself, as you place it back down in the bowl. Repeating on opposite edges, until you have done all 4 sides.
Step 6: Bulk Ferment
After your last folds, we are ready to let our dough sit and ferment. Now many people choose to leave their dough on the counter at this time, but I personally do not. I cover dough and put into fridge for 12 hours. It can stay in the fridge for up to 24 hours, this timeline is very flexible.
If you do want to bulk ferment on the counter, that will totally work as well! I usually leave mine for about 6-8 hours (depending on the temperature of my house). In the winter months when my wood stove is running, and our home is warm, I may only leave it for about 5 hours. In the spring and summer, our home is cooler and then I will leave it closer to 8 hours. If you are just starting out, this sort of trial and error process is normal, as you need to figure out how the dough will behave in your own house. Too long and it will overproof, too short and it will be under proofed.

Step 7: Pre-Shape Dough
Bring dough out of the fridge and allow it to sit out for about 20 minutes. This lets it warm up, and it will be easier to work with. If your dough is still very cold when you go to shape it, it could tear.
Once your dough has warmed up a bit, turn dough out onto clean surface (If you doubled your batch, divide dough into two halves). Circle dough around creating a ball, building tension by tucking edges under as you pull along the surface.
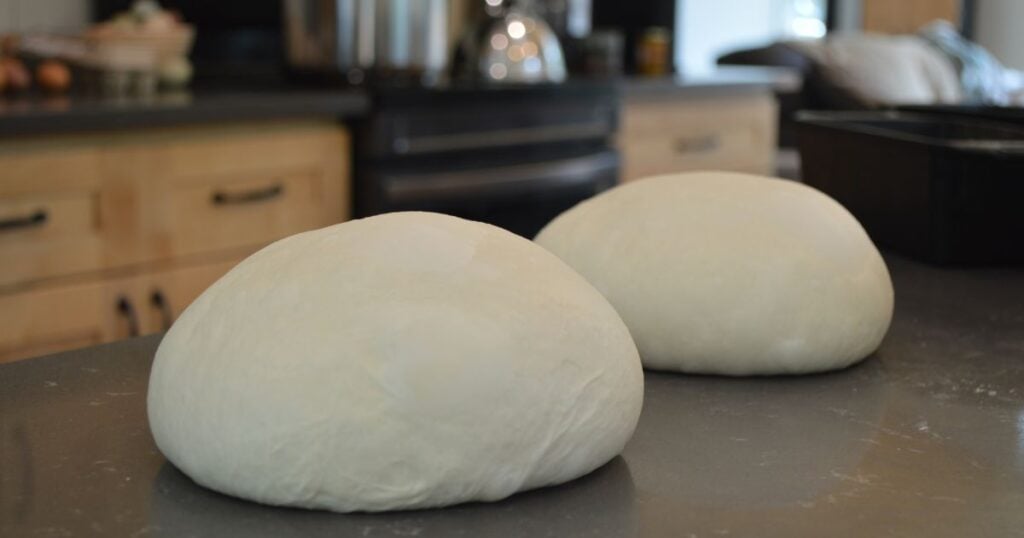
Let dough rest for 15 mins.
*Note: At this point I do not usually need to add any flour onto my surface. However if your dough is feeling sticky, then feel free to lightly dust with flour. Be careful not to over do the flour, as it could impact shaping in the next steps.
Why do we pre-shape? This helps our dough to keep a better final shape. It lets the dough know where it needs to be, and builds outer surface tension. Which later helps with your oven spring and score patterns.
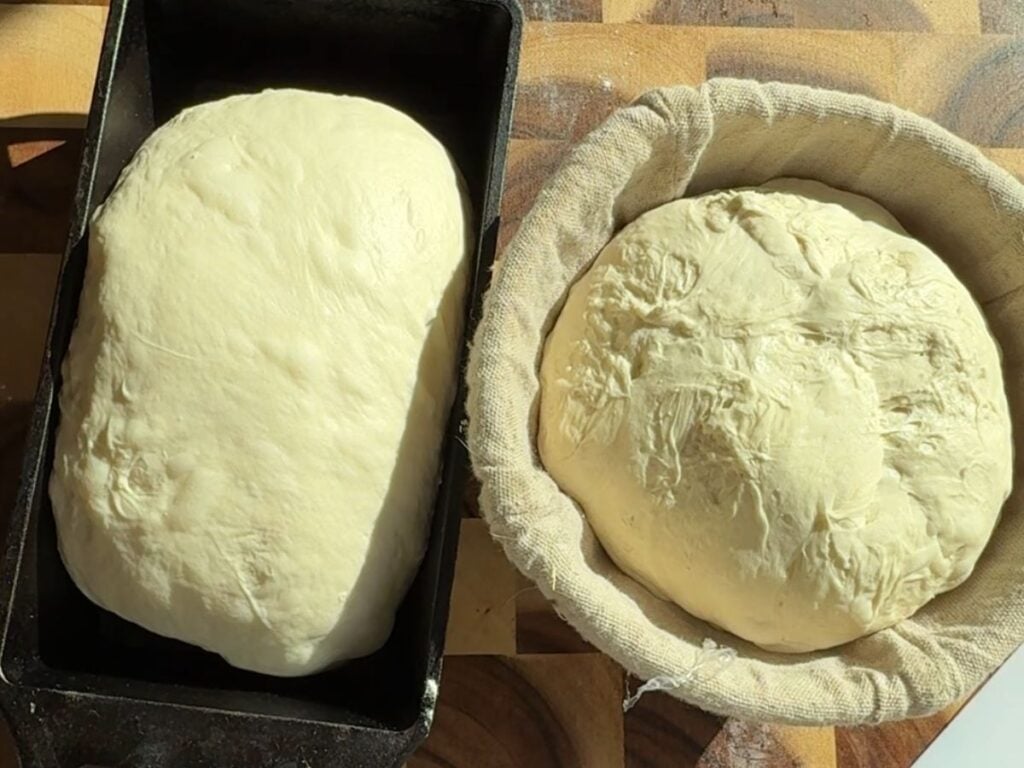
Step 8: Shaping your Sourdough Bread into Sandwhich Style Loaves:
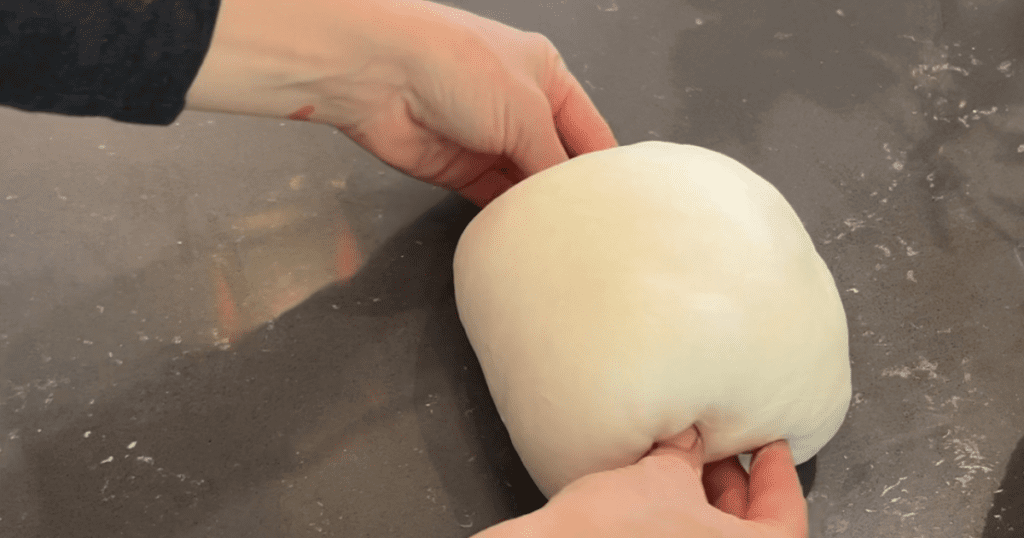
Flip ball of dough over and gently spread dough out into a rectangle, lengthways away from you. Fold long sides into centre to meet, and then roll up and away from you. Gently pulling underneath dough to tuck under and pinching the ends together. Then place into greased or lined loaf pan.

Cover with a tea towel, and allow to sit on counter for 2-3 hours, until positive poke test is achieved.
What is a “Poke Test”? It is a way to see if the dough is ready to bake! How: Take a floured finger and poke it into the surface of the dough. If the indent made by your finger holds- then you are ready to bake! If it pops back out and fills in, the dough needs more time!
Shaping into Artisan Style Loaves:
For shaping a “Batard or Oval” Style, you will shape just as explained above, but instead of placing top side up in a loaf pan, flip upside down and place in your banneton baskets, and cold proof in the fridge for another 12 hours.
If you are wanting to shape a “Boule” or round artisan style loaf, simply flip ball of dough over after the pre-shape, gather opposite sites up and pinch together, do all four sides and then roll up and over and circle dough around building tension. Place upside down in the banneton basket.
Step 9: Score
When the dough passes a poke test, or has cold proofed for 12 hours, preheat your oven to 450F Degrees.
** If you are doing an artisan loaf, preheat your oven with your dutch oven inside **
With a sharp razor blade or knife, give your dough a quick slash down the dough, about 1/2 – 1 inch deep.
Step 10: Bake
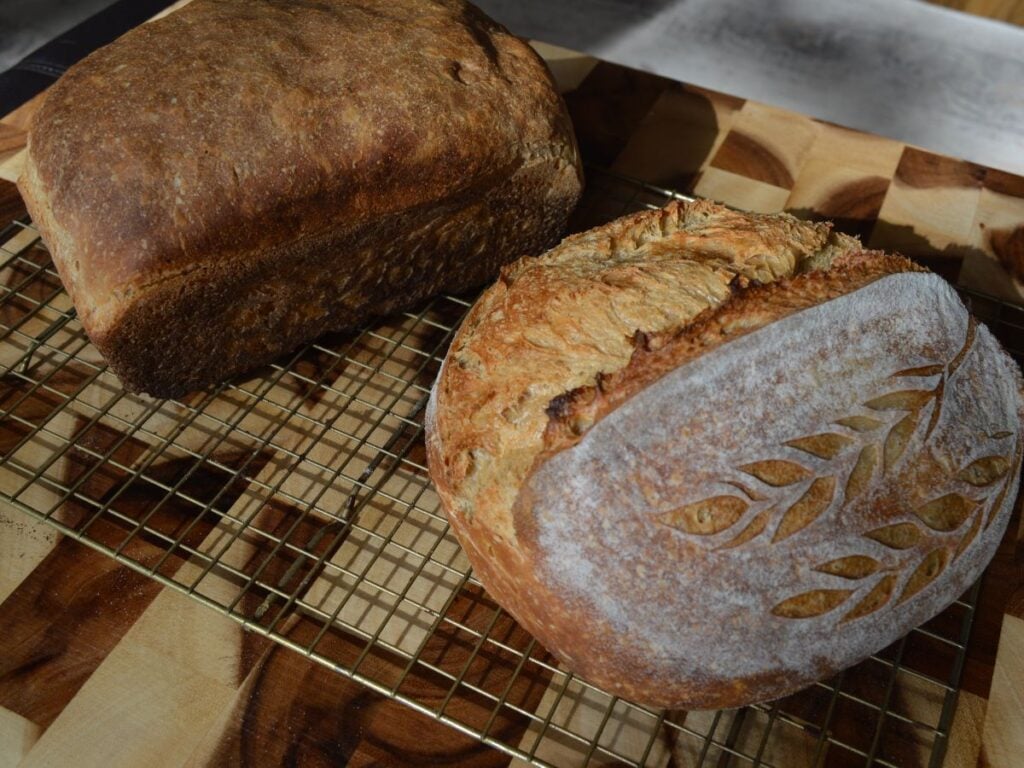
For Sandwich Style: Cover your loaf with tinfoil; leaving space within the foil, for the loaf to rise. You can also cover it with another loaf tin on top. This works really well!
Bake at 450F Degrees for 20 minutes, remove cover and drop the temperature to 425F Degrees and continue to bake for 15 minutes. You can check the internal temperature to ensure it is finished, the inside should read 200F Degrees.
Remove from the oven, rub top with butter and allow to sit in the pan for 10 minutes. Both of these help to keep the crust softer.
For Artisan Style Loaf: Flip loaf out of banneton basket onto parchment paper or bread sling, and give the loaf a score or slash along the side to release steam when baking. Gently place loaf in your preheated dutch oven with the lid on and bake at 450F for 24 minutes, at which point you will uncover the loaf and drop the temperature down to 425F, and continue to bake for another 13-14 minutes.
Remove from oven and place loaf on cooling rack.
Once you remove from pan, let cool completely before cutting…. I know this part is hard!


Beginner Sourdough Bread
Ingredients
- 125 g Active Starter or Leaven
- 400 g Bread Flour
- 280 g Water
- 7 g Salt
Instructions
- 10-12 hours before you are wanting to start your bread: feed your starter appropriate amount or make up leaven ( I like to feed my starter in the morning and mix my dough in the evening)
Mixing Dough:
- When starter/leaven is ready: Add water into a mixing bowl, add your active starter/leaven. Mix well until it is cloudy.
- Add your flour, mix until it comes together. If you have a stand mixer you can use it for this portion. Dough will be sticky at this point.
- Let dough autolyse for 30 mins.
- Then add your salt, pinch and work into dough. Dough should be a bit smoother, but still sticky.
- Let dough rest 30 mins.
Fold Series:
- Do first set of stretch and folds OR coil folds. You are going to repeat your chosen folds 3-4 times, every 30-45 mins.
- When folds are complete cover dough and put into fridge for 12 – 24 hours, this timeline is very flexible. You can bulk ferment on the counter, this will shorten your time to about 6-8 hours (depending on the temperature of your house.)
- 12-24 hours later bring dough out of the fridge to warm up, for 20-30 minutes.
Pre-Shape:
- Bring dough out onto clean surface and circle around creating a ball, and building tension, let rest for 15 mins.
Shaping & Baking Sandwich Style Loaf:
- Flip dough over and gently spread dough out into a rectangle, lengthways away from you. Fold long sides into the centre to meet in the middle, and then roll up and away from you. Gently pulling underneath dough to tuck under. Then place into greased or lined loaf pan.
- Cover with tea towel, and allow rest on counter for 2-3 hours, until positive “poke test” is achieved.
- when dough passes poke test: Preheat oven to 450 F degrees.
- Baking:Cover loaf with tinfoil- leaving room on top for dough to rise. Bake at 450 F for 20 minutes, then remove tinfoil and drop oven down to 425 F and bake for 15-16 minutes. Check with thermometer that inside temperature is 200F before taking out.
- Remove from oven and allow loaf to sit in pan for 15-20 minutes, when loaf is still hot rub top with butter. Both of these things are going to work to soften the crust.
- Remove from pan and allow to cool for 2-3 hours before cutting. I like to let my loaves set up for 8 hours before cutting.
Shaping & Baking Artisan Style Loaf:
- Oval or "Batard": Flip dough over and gently spread dough out into a rectangle, lengthways away from you. Fold long sides into the centre to meet in the middle, and then roll up and away from you. Gently pull underneath the dough to tuck under. Flip and place in banneton basket or well floured tea towel lined bowl, upside down. Proof in fridge for 12 hours.
- Round or "Boule": Flip dough over and gently spread dough out in a circle, just a bit, then bring opposite sides up and together in the centre and pinch or clasp, so they stick together. Do this on all four sides, then gently rolled up and over and circle dough around, building tension. Flip upside down, and place in banneton basket. Proof in fridge for 12 hours.
- Baking:Once dough has cold proofed for 12 hours, preheat oven to 450℉ with your dutch oven inside. Flip dough out onto parchment paper or bread sling, give dough a score or slash with a sharp razor or knife, to direct steam while baking. Place in dutch oven with the lid and bake for 24 minutes at 450 ℉, then uncover dutch oven, drop your oven temperature down to 425 ℉ and continue to bake for 13-14 minutes.
- Remove from oven, and place on cooling rack. Allow bread to completely cool before cutting into it.


I’m not sure if I missed something but how does this recipe differ from a regular sour dough boule. The ingredients are the same.
It doesn’t other than the shape, we prefer it over a “sandwich sourdough loaf”, because I find that you lose some of those traditional sourdough characteristics that I love! So this is just a traditional style recipe, streamlined and shape into a sandwich shape- which I find easier for things for my kids 🙂
Do you have storage notes for this? How long do you think it’d be good on the counter for?
In a sealed bag I usually say 4-5 days for my bread on the counter, if you go through loaves slower I suggest slicing and freezing it and take out as needed!
What temperature do you typically bulk ferment (during rest and coil fold stages), prior to refrigeration?
Our house is warmer this time of year when the woodstove is going, so it ranges from about 21-23 C, so my dough just sits on the counter during my rest and fold stages.
Do you rest your loaf in the pan after shaping? Or do I leave it on the counter for 2-3 hours?
Yes I place it in the pan and then rest it for 2-3 hours, until it passes a poke test 🙂
What if it still fails the poke test after 3 hours? Do you keep letting it rest for more hours?
Yes I would!
Why is my crust so tough
Sometimes that can happen, if you want a softer crust try decreasing your uncovered bake time, you can also put some ice cubes in your dutch oven!
Live the sandwich loaf, going to try the artisan style loaf..after shaping & before putting back in fridge for second round of cold ferment..do I let it rise for a few hours?
Nope, just shape it, you can let it sit for about 20 minutes in the banneton and “sew it up” and then directly into the fridge for the final cold proof!